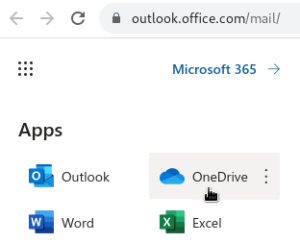
OneDrive is an online file storage system connected to your BMCC Mircosoft account. It is part of the Microsoft 365 suite of online software. Like you can access your email online through the Outlook Web App, you can use the OneDrive file storage through your web browser.
From the Outlook Web App, select the menu in the upper left.
If you prefer to use the desktop versions Word and Excel, then you can sync your OneDrive files to your computer for use with these desktop application. To do so, use the OneDrive App from your computer. If you have not used this before, then you will be asked to log in to your BMCC account. This will create a new folder in your File Explorer.
Syncing files with OneDrive Tutorial
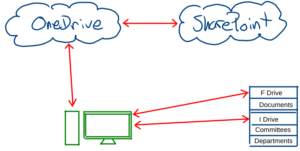
OneDrive and SharePoint actually work very similarly to the I Drive and F Drive you are used to, but they are accessible from anywhere, not just on campus.
Benefits of using OneDrive file storage are:
For help using OneDrive contact:
Share OneDrive Files and Folders Tutorial
Share SharePoint Files and Folders Tutorial
From a OneDrive or SharePoint Document directory, we recommend using the “Manage Access” screen to set and get the appropriate share link.
From the … menu button for a file or folder,
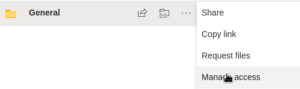
then select Manage Access to copy the appropriate link.
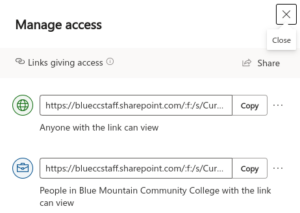
Beware the link that states “Anyone with the link can edit”.
Yes. At a minimum, you must take attendance for the first week. It is helpful to Financial Aid and Student Records if you record attendance periodically throughout the term.
Why do instructors need to record attendance?
To receive financial aid or a grade in the class, students must be active in the class during the first week. For other federal and state compliance reasons, instructors must mark all students ‘present’ or ‘absent’ for at least one day before the end of the first week of class. The deadline for submitting attendance each term is the “Last Day to Post 1st Week Attendance” line in the Academic Calendar.
Important Note about administrative drops: BMCC does not have an automatic process for administratively dropping students from courses in the first week, using attendance or otherwise. If you need to admin drop a student from a course in the first week for lack of attendance, do the following:
I’m teaching an online-only class which has no meeting times. Do I need to record attendance?
Yes! All instructors must record attendance for all students in all courses before the deadline each term. How to determine attendance in online courses is up to each individual instructor. The recommended way is to require an assignment (regular assignment, quiz, discussion post, etc.) in Canvas during the first week of the term and consider an assignment submission by a student to be a ‘present’ attendance record. When using the BMCC Canvas Attendance Tool (details below), activity in your online courses will automatically be marked as present.
How do I record attendance for students?
Video Guide (video part 2, includes rosters and attendance)
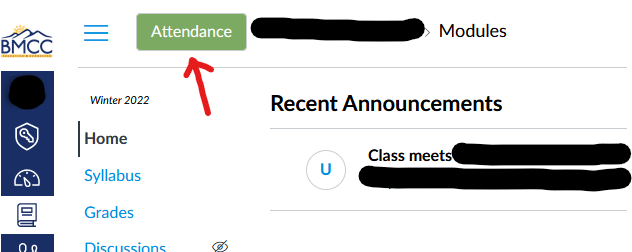
The recommended way to record attendance for all classes is to use the BMCC Canvas Attendance Tool. This tool was built by BMCC computer science faculty and is not part of the normal Canvas installation – right now it only exists at BMCC. If you have any questions about how to use the tool, please do not contact Instructure or post on Canvas forums as they won’t know anything about it. See the If you need help section at the bottom of this page if you have questions or encounter any errors using the tool.
The rest of this page includes detailed instructions for how to use the BMCC Canvas Attendance Tool.

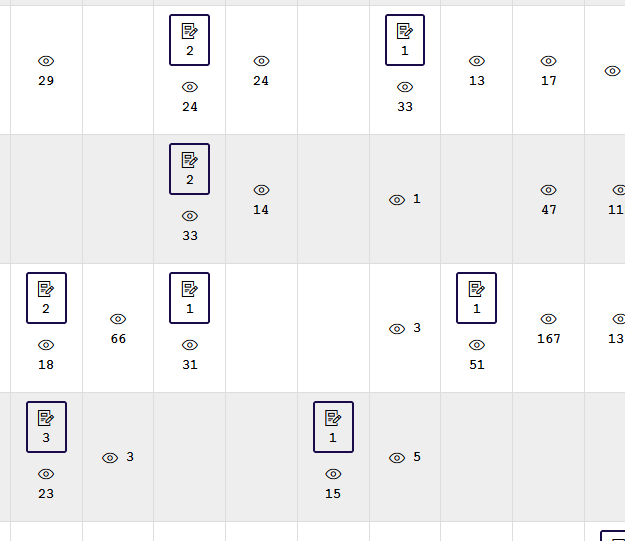
For online-only courses with no standing meeting times, course activity will automatically be marked present (note: only activity will be marked present, not page views):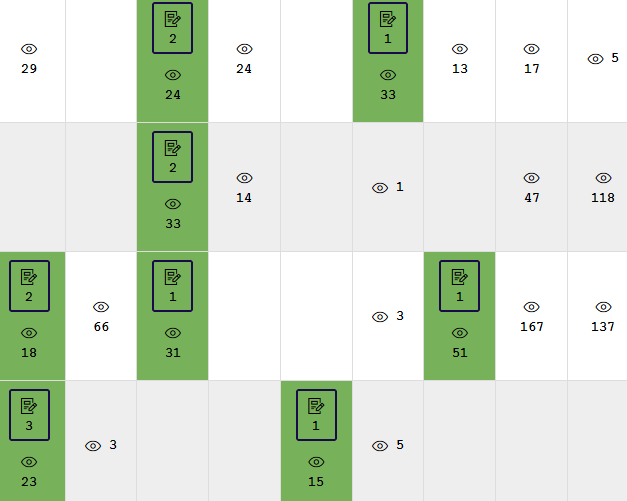
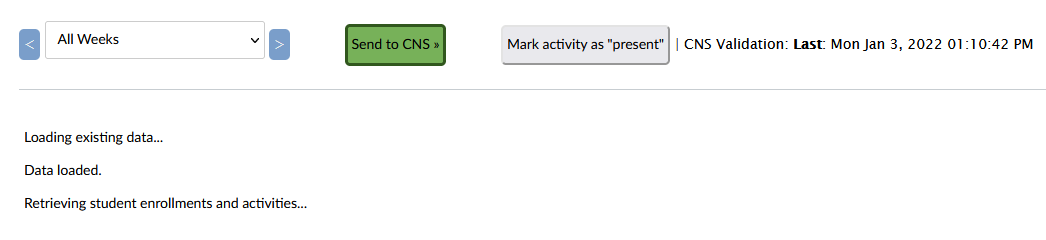
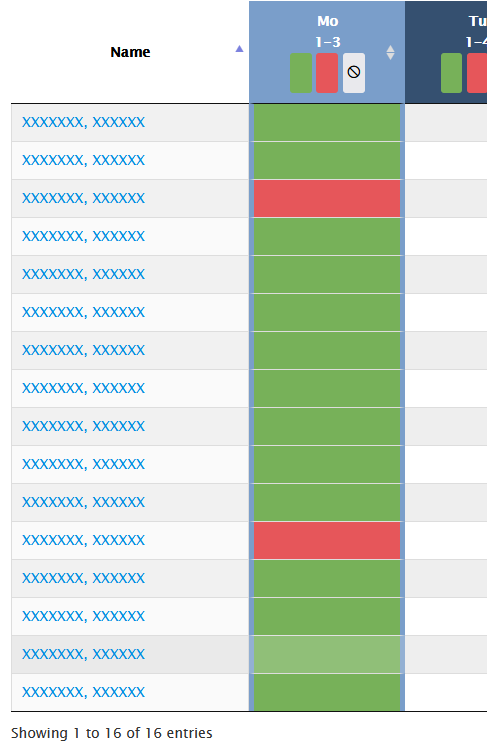
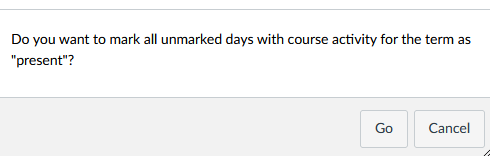
If your course has regular meeting times, course activity in Canvas will not automatically be marked present. However, you can still use this feature manually by clicking the “Mark Activity Present” button at the top of the tool. The tool will ask for confirmation before marking all activities as ‘present’.
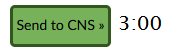
This final step is the most important! While recording attendance in step 4, the data is saved within Canvas only. The BMCC tools have an integration with Anthology Student but that step must be initiated separately. To “push” your recorded attendance to Anthology Student (was CNS), click the “Send to CNS” button

The confirmation box will indicate how many records will be sent (records already sent will not be resent)
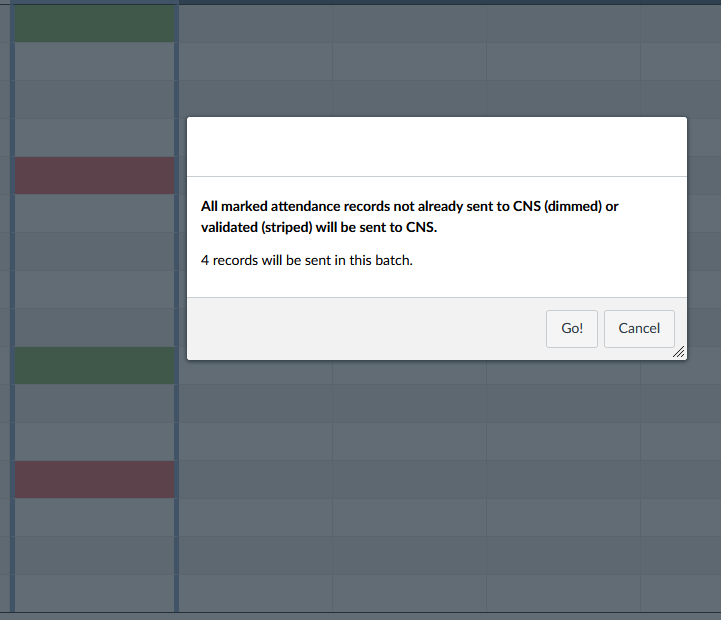
If you click “Go!” the records will be sent in a batch. At this point It will take up to 3 minutes for the Anthology Student integration tool to receive and confirm the data. The records you just sent will be “dimmed” in the interface and a 3 minute timer will begin at the top, next to the “Send to CNS” button

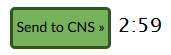
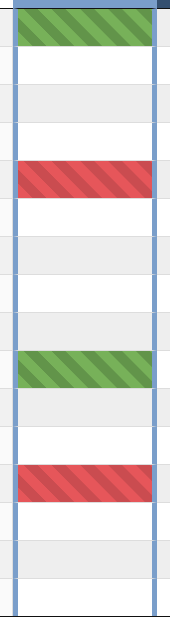
After 3 minutes, the tool will automatically retrieve the attendance data from CNS to confirm it was received. Records that are verified will be marked with a light/dark diagonal pattern:
Don’t worry if you accidentally close the page before the timer runs out! The data has still been sent and will be automatically retrieved for verification the next time you load the page.
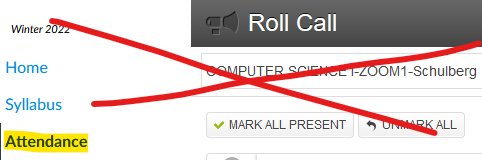
Canvas does include another Attendance tool called “Attendance Roll Call”, available as a Navigation item — that tool will NOT work for sending attendance to CNS. That tool was not built by BMCC and has no connection to Anthology Student (CNS). There’s nothing wrong with using that tool for your own use, but none of that data can be sent to CNS and you would need to ALSO either enter attendance directly in the faculty portal, or use the BMCC Attendance Tool as described above.
If you have questions about how to use the tool or encounter any errors while loading or using the tool, please email Greg Schulberg (gschulberg@bluecc.edu) and copy Gary Parker (gparker@bluecc.edu). Please include the name of the course you were working on when you had the question or error, a URL to the course in Canvas (copy/paste the URL from the address bar on the course home page), details about the issue and screen shots if possible.
Log in to Focal. Select the Grading tab, and then the class you wish to submit grades for.


Select “Set Incomplete”

This will pop up a new window where you’ll be required to provide 3 things:

Note: once you set an incomplete for a student, the normal “Grade” dropdown will be inactive:

To change it back to a regular grade, see “Resolving an Incomplete” below.

Enter the final grade

Log in to your account at YouCanBook.me. Note: you must select “Login with Microsoft” and login with your BMCC account.
You should see a booking page in your dashboard.

Select the pencil icon to the right of your booking page to edit the settings.
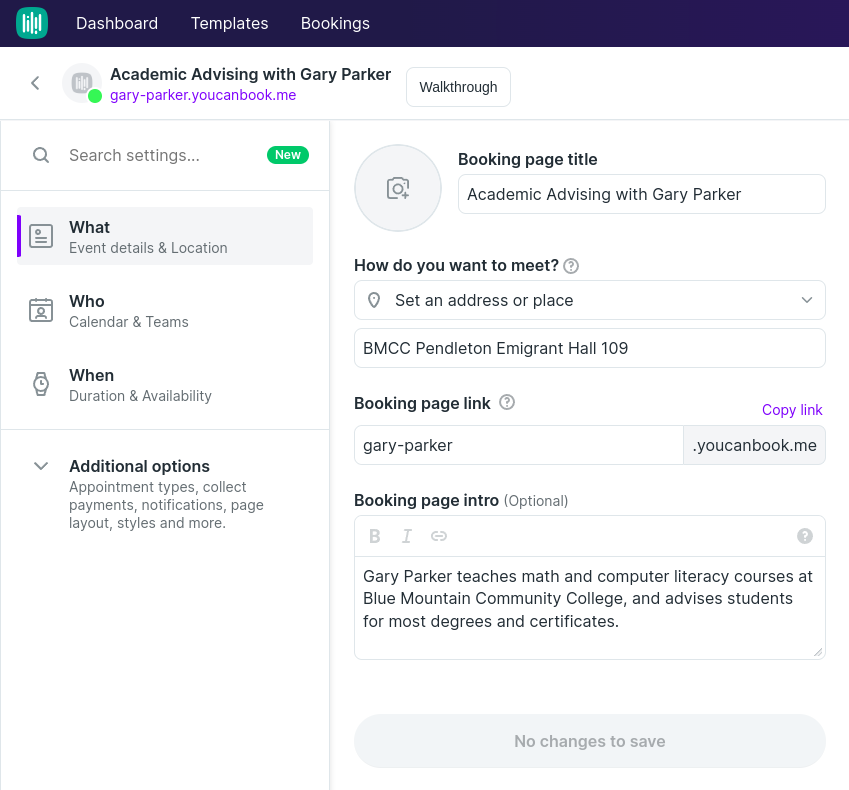
The first page of settings, What, allows you to set the page title, default meeting method, booking page link, and introductory information about you and advising.
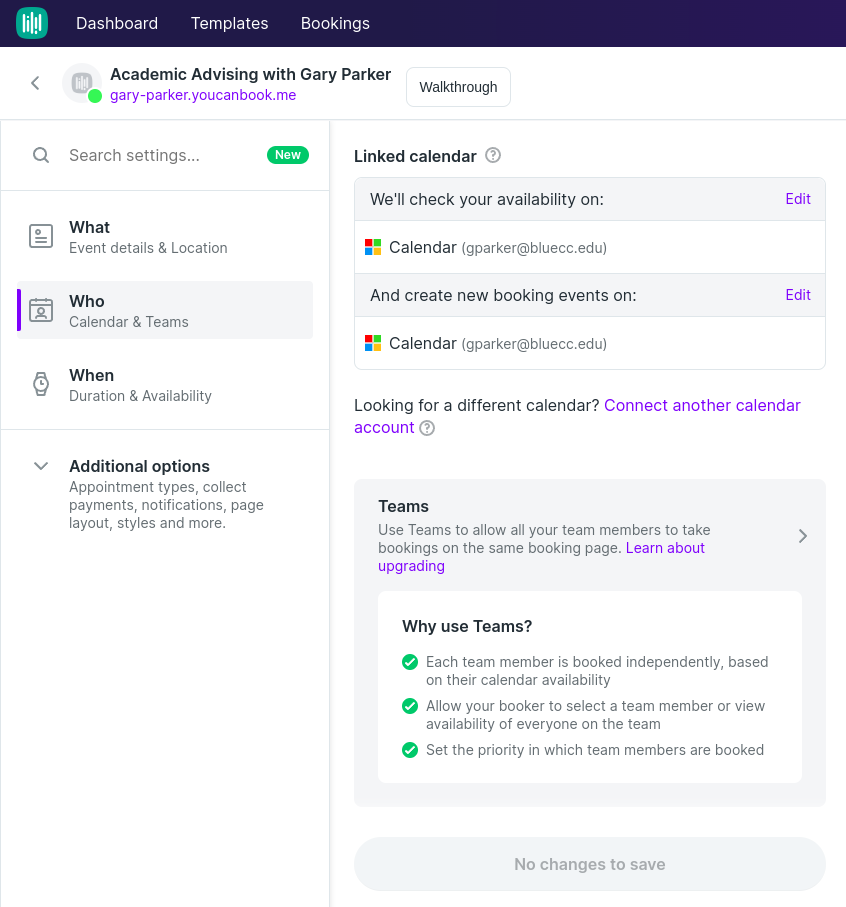
The Who settings tab shows connected calendars, like your Outlook calendar. This should already be connected.
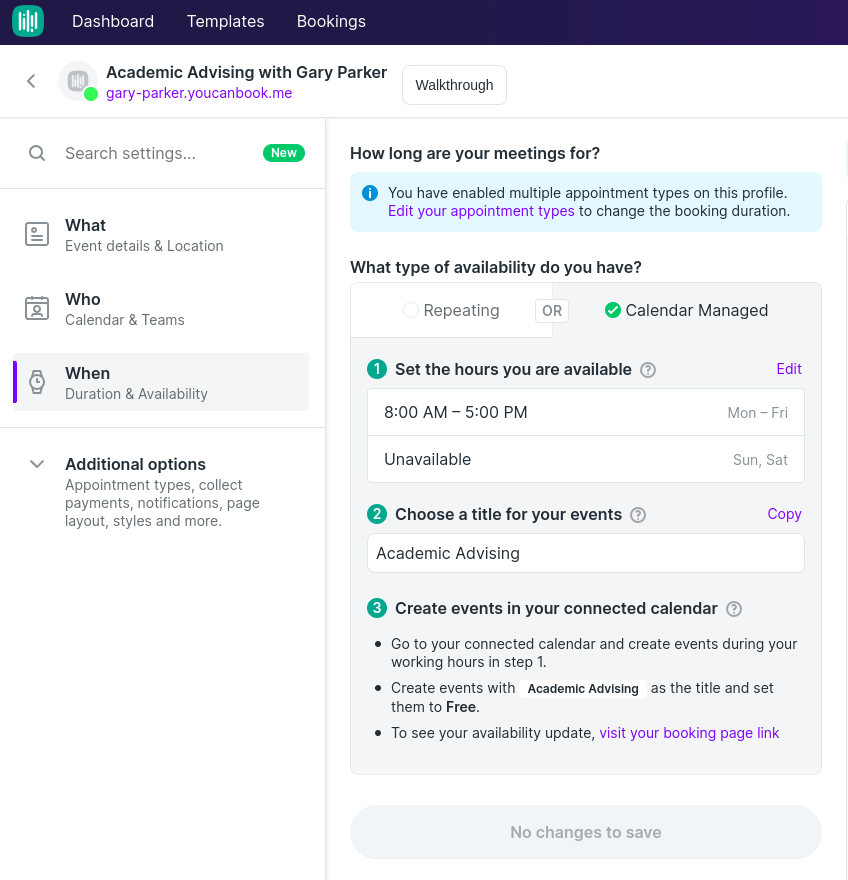
The When settings tab controls how YouCanBookMe interacts with your calendar.
The Repeating option below pulls open spots or free events within the set availability for students to schedule appointments.

The Calendar Managed options pulls only events with the designated title that are set as free for students to schedule appointments.
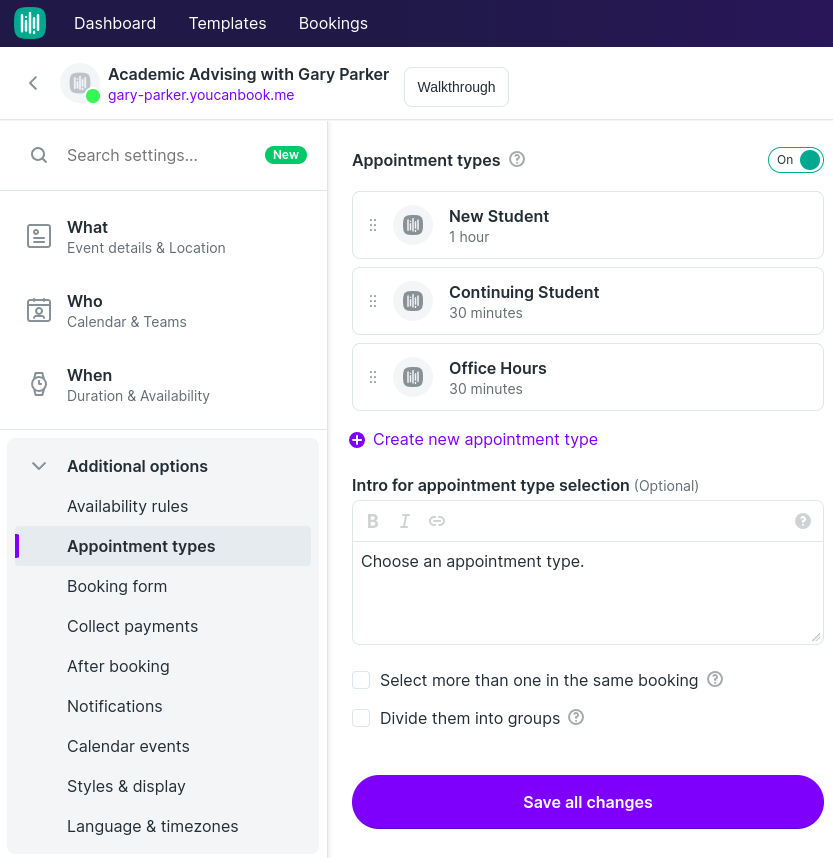
Additional Options:
Check out Appointment Types and Booking Form.
You will have the default appointment that comes with the booking page. You can customize it and add other options. For example:
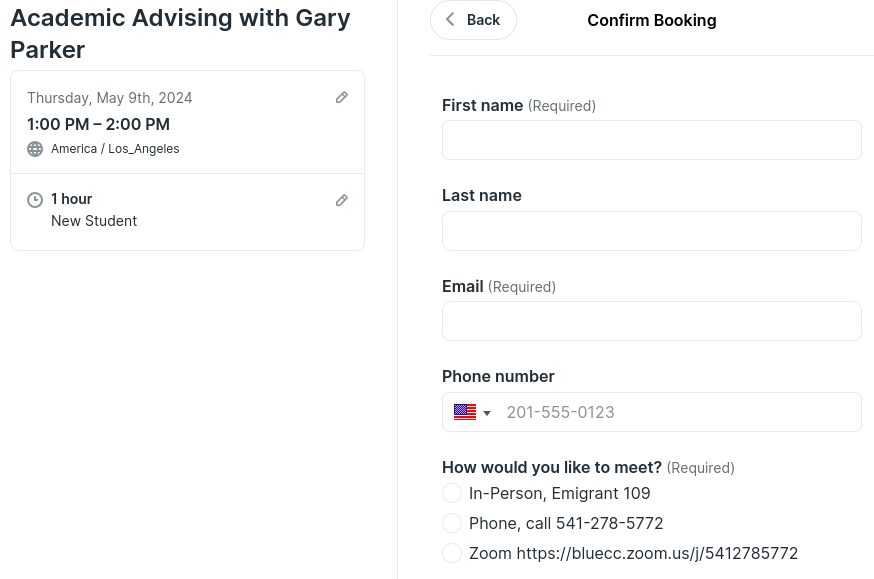
The Booking Form comes with fields for First name, Last Name, and Email. You can add other fields like phone or a multiple choice question asking how the student wants to meet.

Here is what the students would see.
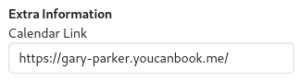
Once your booking page is configured you should add the calendar link to your User Profile in Focal.
Contact IT or Gary Parker if you have any questions.
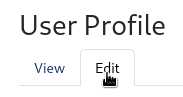
Edit your User Profile in Focal.

Scroll to the bottom to add your calendar link.
This will appear for students in the Focal home page.

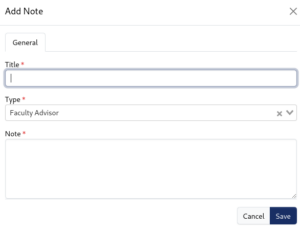
After selecting a student in Focal, select the Notes tab, then the ADD button in the upper right of the notes listing.
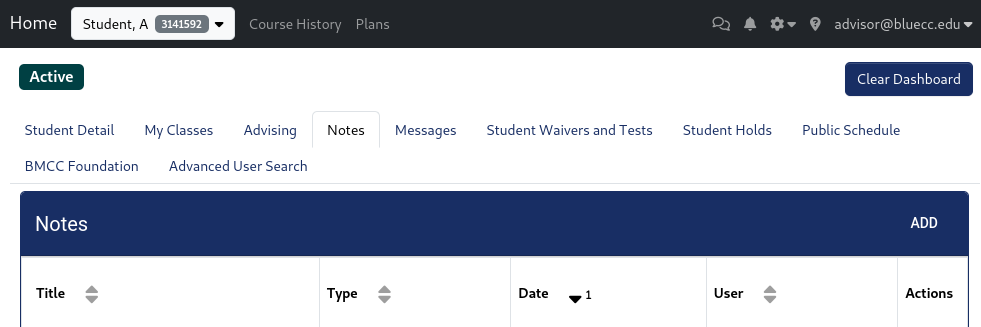
In the Add Note window enter a title, select a note Type from the type dropdown menu, enter your notes, and then save.
There are many ways to link to and embed videos in a Canvas page, discussion, quiz, or assignment.
If you have a shareable link to an online video, then you can simply link it on a canvas page.
Type some link text, then select the text, then select the links button ![]() , and past the URL into the link field.
, and past the URL into the link field.
Screenshot of Insert Image dialog box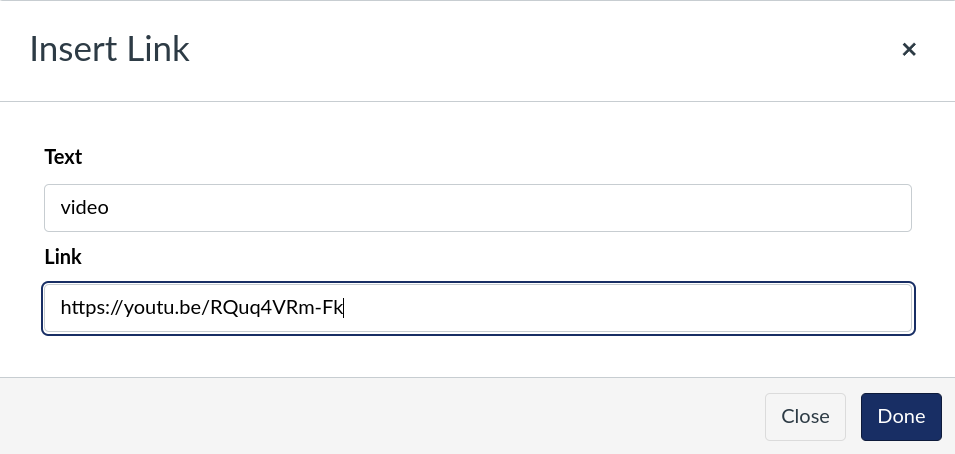
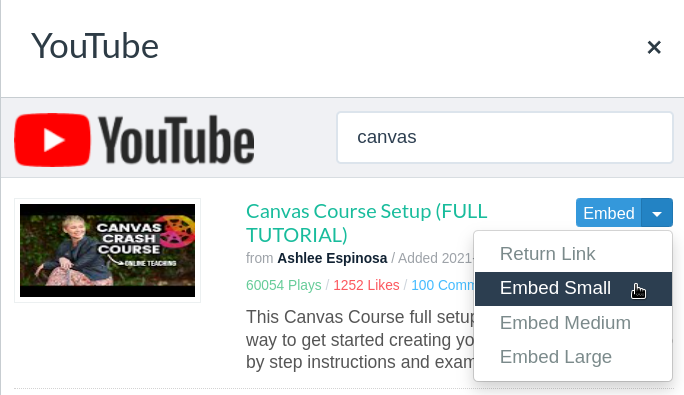
You can embed videos so that the video can be watched in Canvas using the Apps button. From the place on the page that you want your video to appear, select the Apps button ![]() , then select the app that you wish to use or View All to search for an app like YouTube, TedEd, Kaltura, etc. Once you have selected the App search for the media that you wish to embed. Select the embed style, link, small, medium, or large.
, then select the app that you wish to use or View All to search for an app like YouTube, TedEd, Kaltura, etc. Once you have selected the App search for the media that you wish to embed. Select the embed style, link, small, medium, or large.
Screenshot of YouTube App embed dialog box
Linking and embedding videos Tutorial Video.
Canvas guide to YouTube videos.
My Media is an application from Kaltura to store media files. Media files can be added directly in My Media or using the Zoom integration in Canvas. If you scheduled Zoom meetings from within Canvas, then Kaltura retrieves the files from the Zoom cloud to appear in My Media. Videos are stored in Kaltura’s online storage. You then choose to publish which videos appear to students in the Media Gallery.
The Media Gallery is where students can view the videos you published for them from My Media or other places.
EdPuzzle is an online app that allows you to embed questions in videos. The videos can be yours or from YouTube. You can add open-ended or multiple choice questions, along with typed notes and audio notes. You have the option to not let students scroll forward through the video.
EdPuzzle in Canvas Tutorial Video.
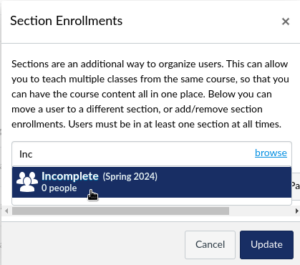
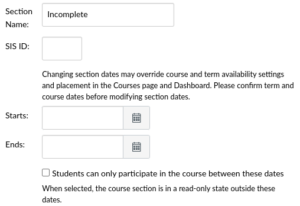
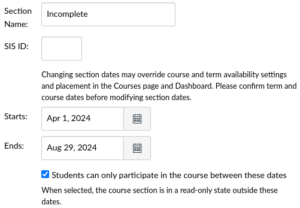
You can add a section to your course with a different end date so that only students in this new “incomplete” section will still see the class as live in the Canvas Dashboard.

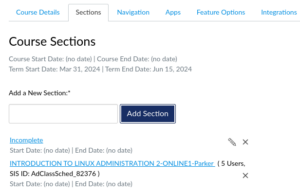

Next you will go to the People page to add people to this new section.